


Is That The Chattanooga Choo-Choo?
Yes, yes. Track 29.

Here are some more pictures from my (previously unaccessible) external hard drive.
We interrupt this Substack post for an important Public Service Announcement: Back up your files - Dammit!
There is a very nice railroad museum, in Golden, Colorado, just down the street from the Coors Brewery. The Colorado Railroad Museum, has a great collection of locomotives, and rolling stock that served in Colorado. Most of it is outdoors, and is just waiting to have someone take a picture.
Who am I to say no?
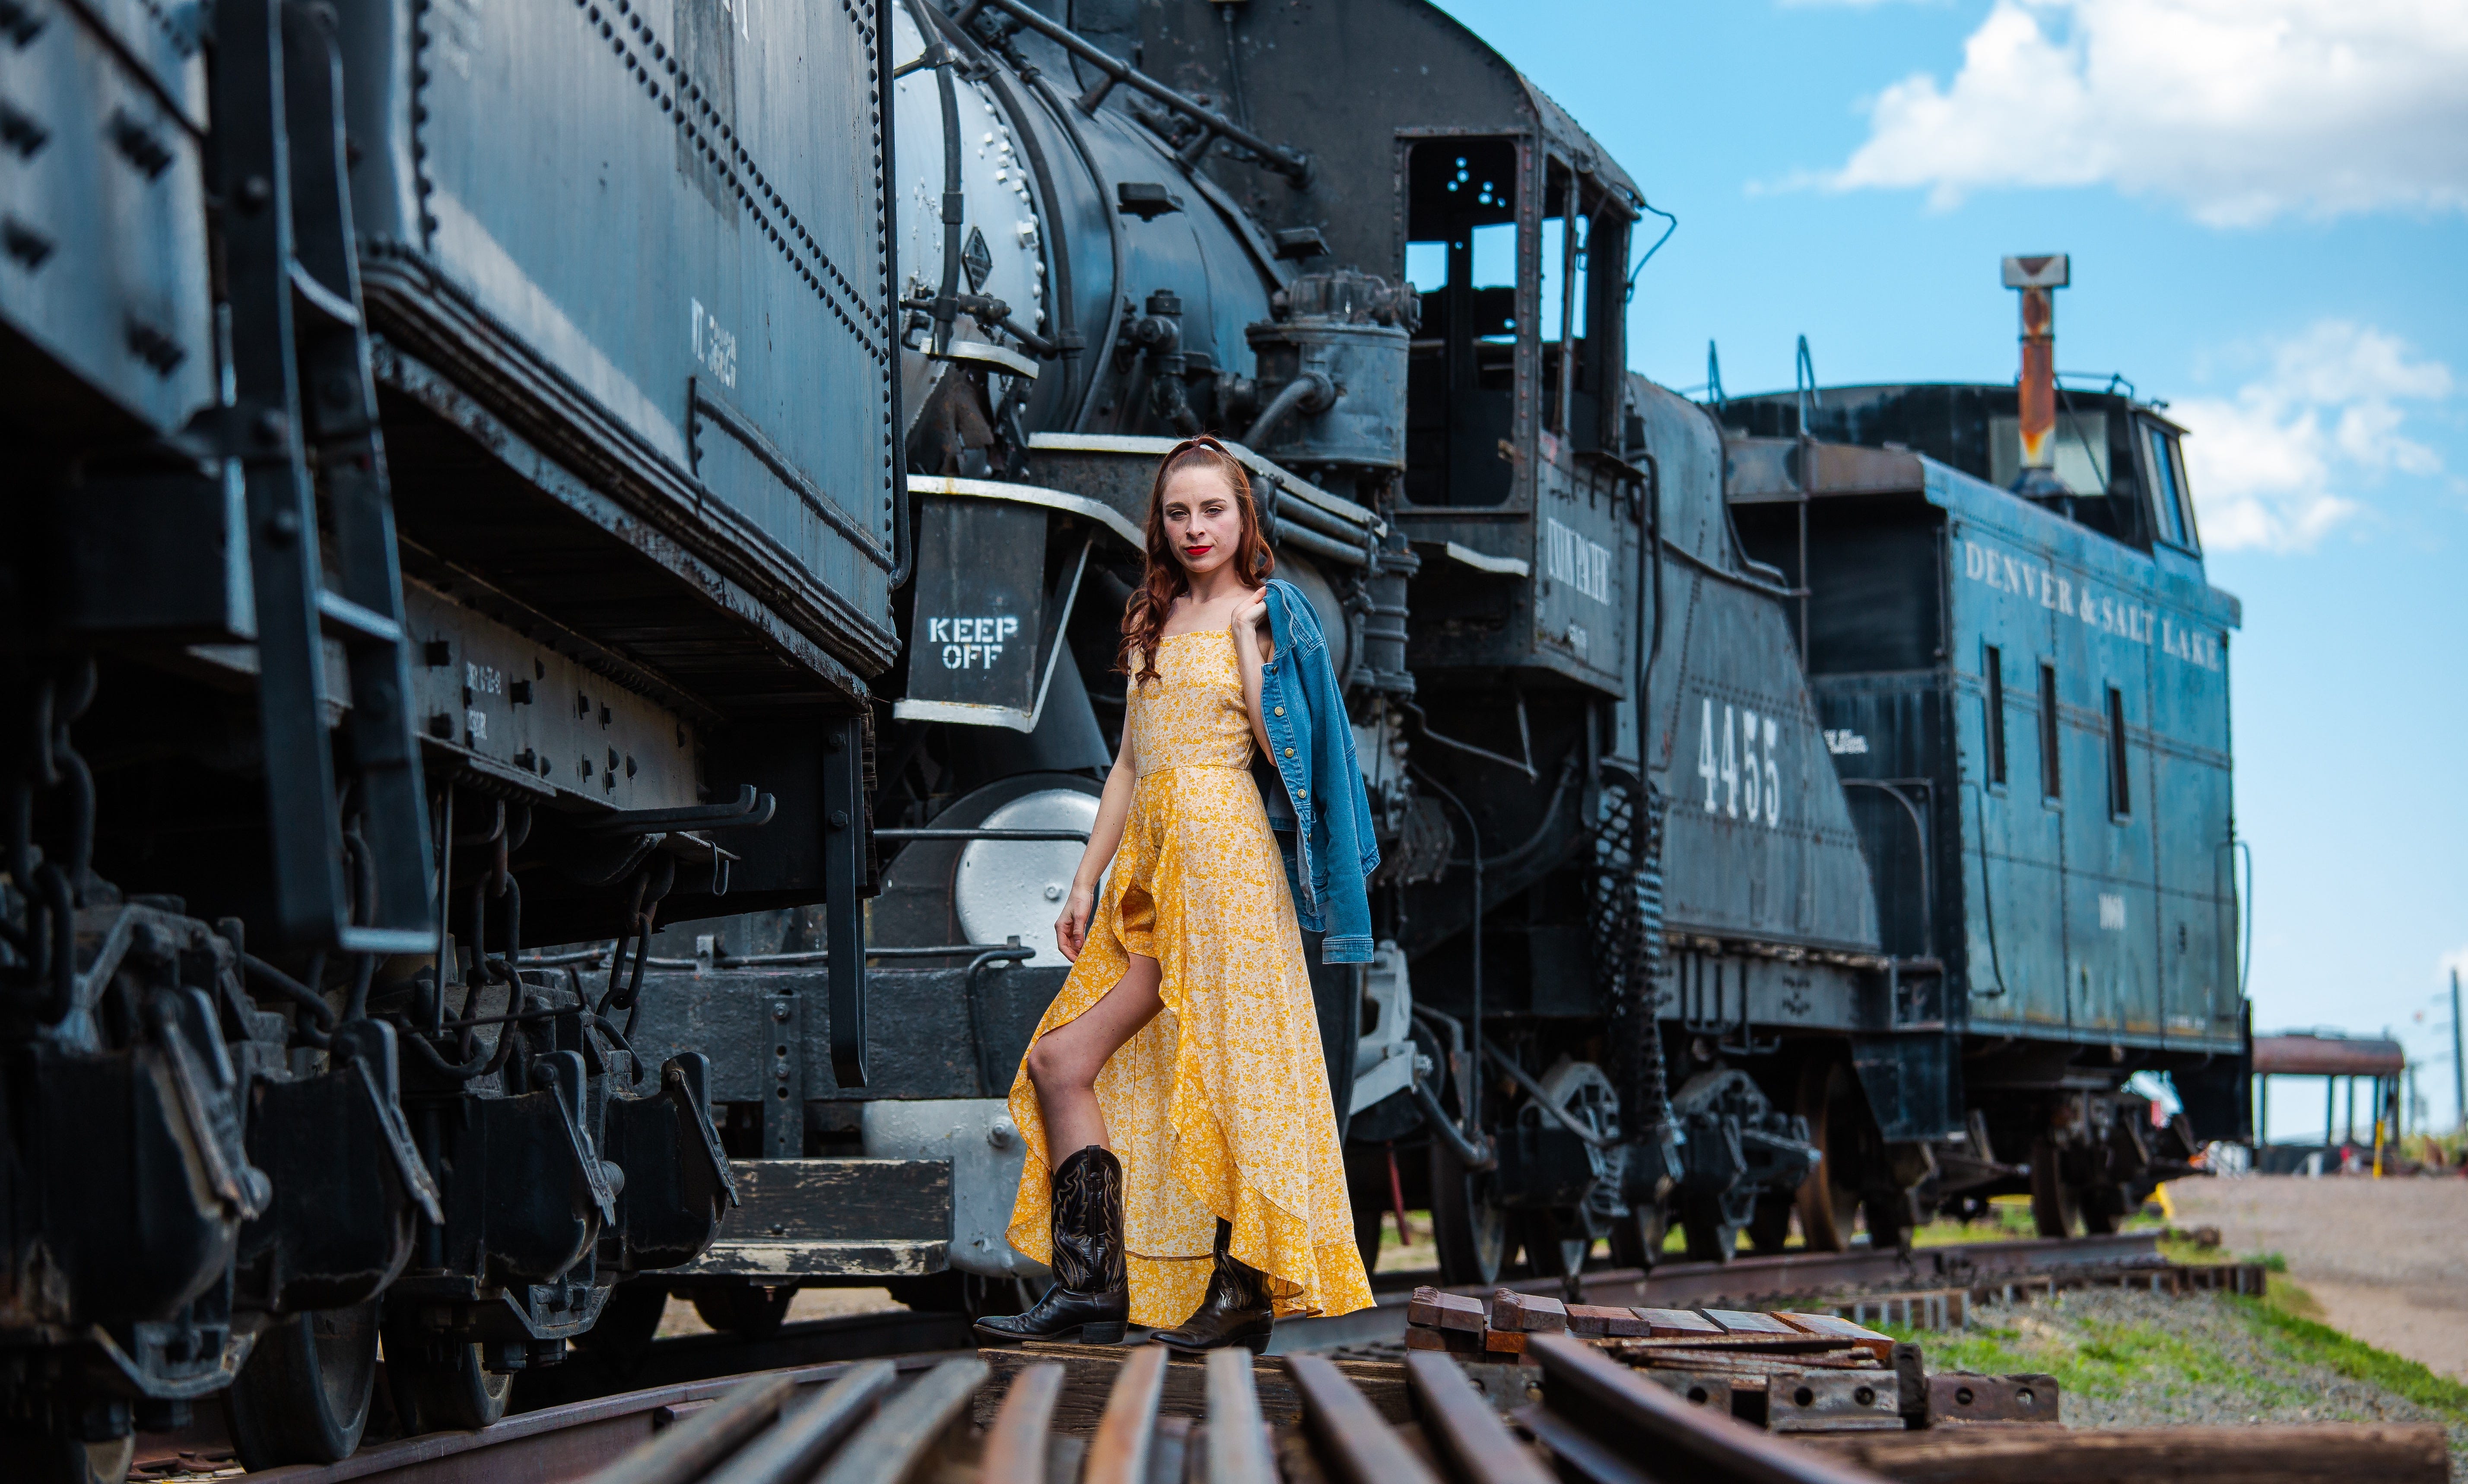
I found a model, Jessica, who agreed to meet me at the museum, one afternoon after work. I told Jessica to wear what she wanted, and she wore this garment. I am not quite sure what this outfit might be called, but it turned out well.
In this post, I would like to show how I process my RAW files. I get both color and B&W options with a RAW file. Simply stated, a RAW file is the closest thing that you might get to actual film in your camera. You get everything your sensor see, without the addition of any special sauce that camera manufacturers add in, if you shoot in .jpg format.
The shot above was one of the first of the afternoon. This is the processed file, the original was a touch flat, meaning, the colors did not have much saturation, so I added some. The sky got bluer, the jacket got bluer, the dress got yellower. Not too much, just a bit.
Here’s the same shot in B&W.
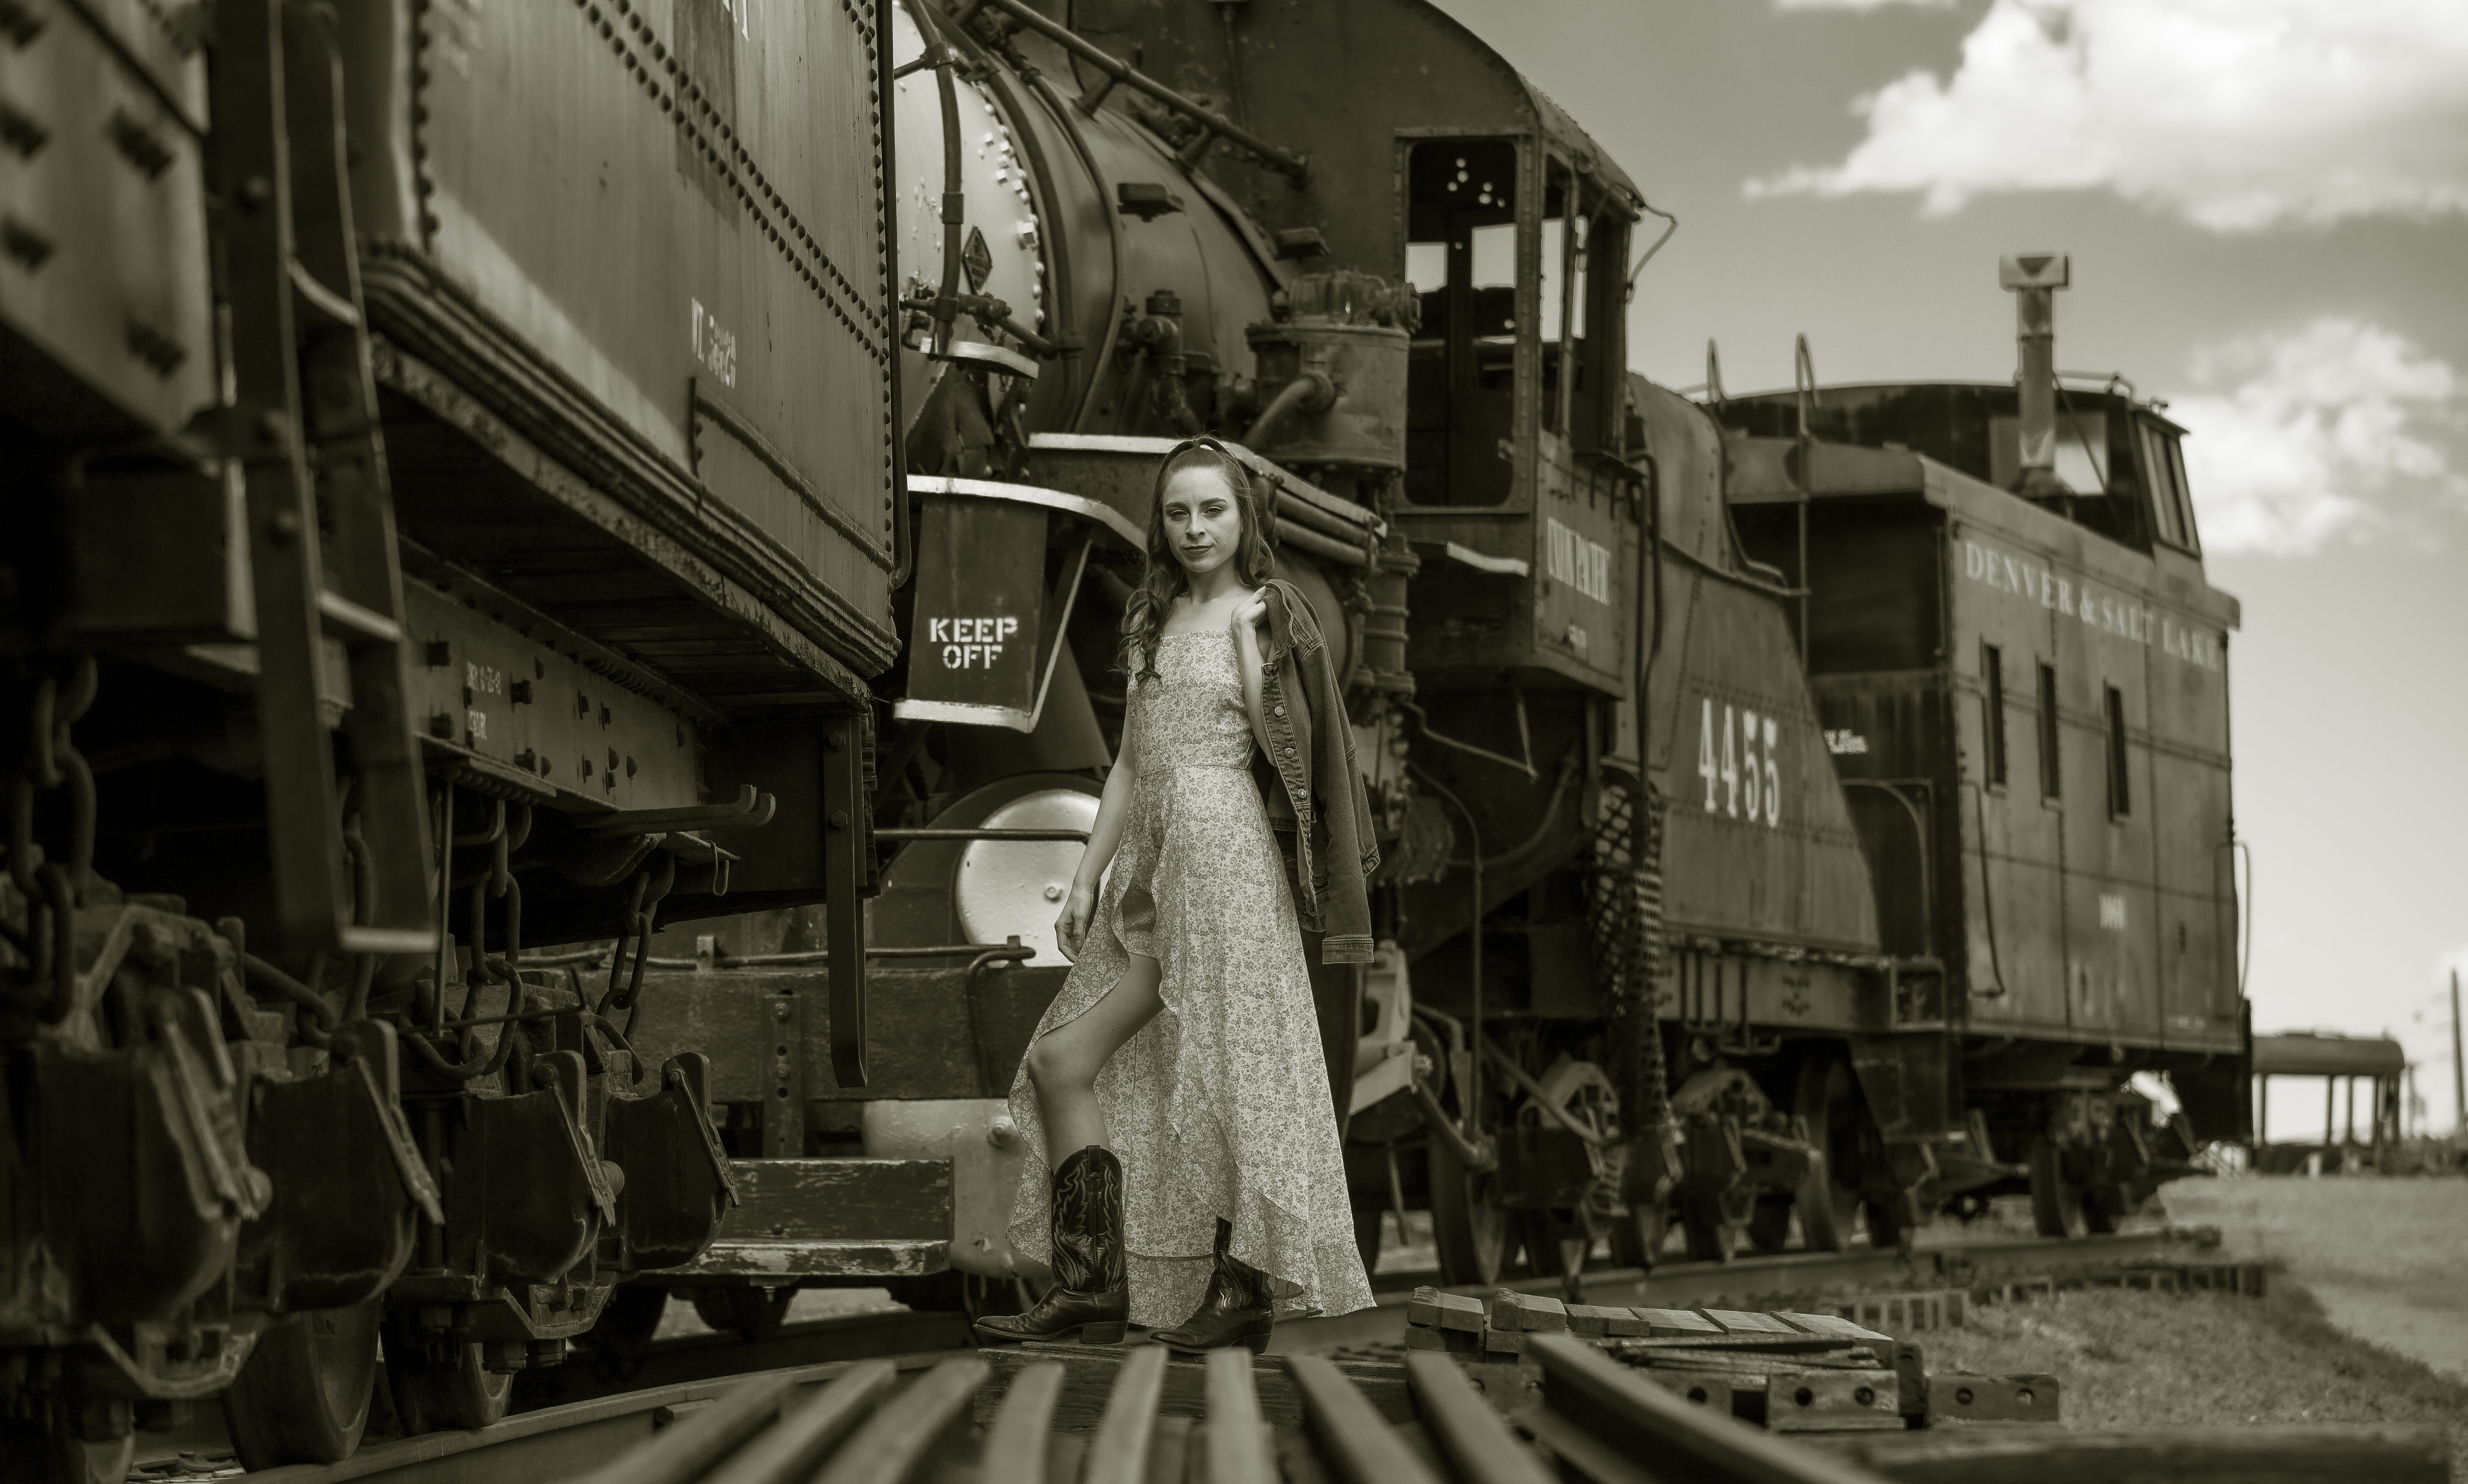
Strictly speaking, this is not a true B&W processing. I put a bit of sepia into the shot, trying to make it look “vintage”. While I didn’t hate the look, this was the only time I used it. I also depend the saturation on the yellows, which makes the pattern on her dress stand out.
Wait! If you are making a B&W shot, where does the color yellow come in?
Since I am dealing with a RAW file, all of the color from the original shot is there. My editing program shows me the true B&W image, but it still gives me access to the full range of color and light that hit the sensor.
I’ll show you another example.
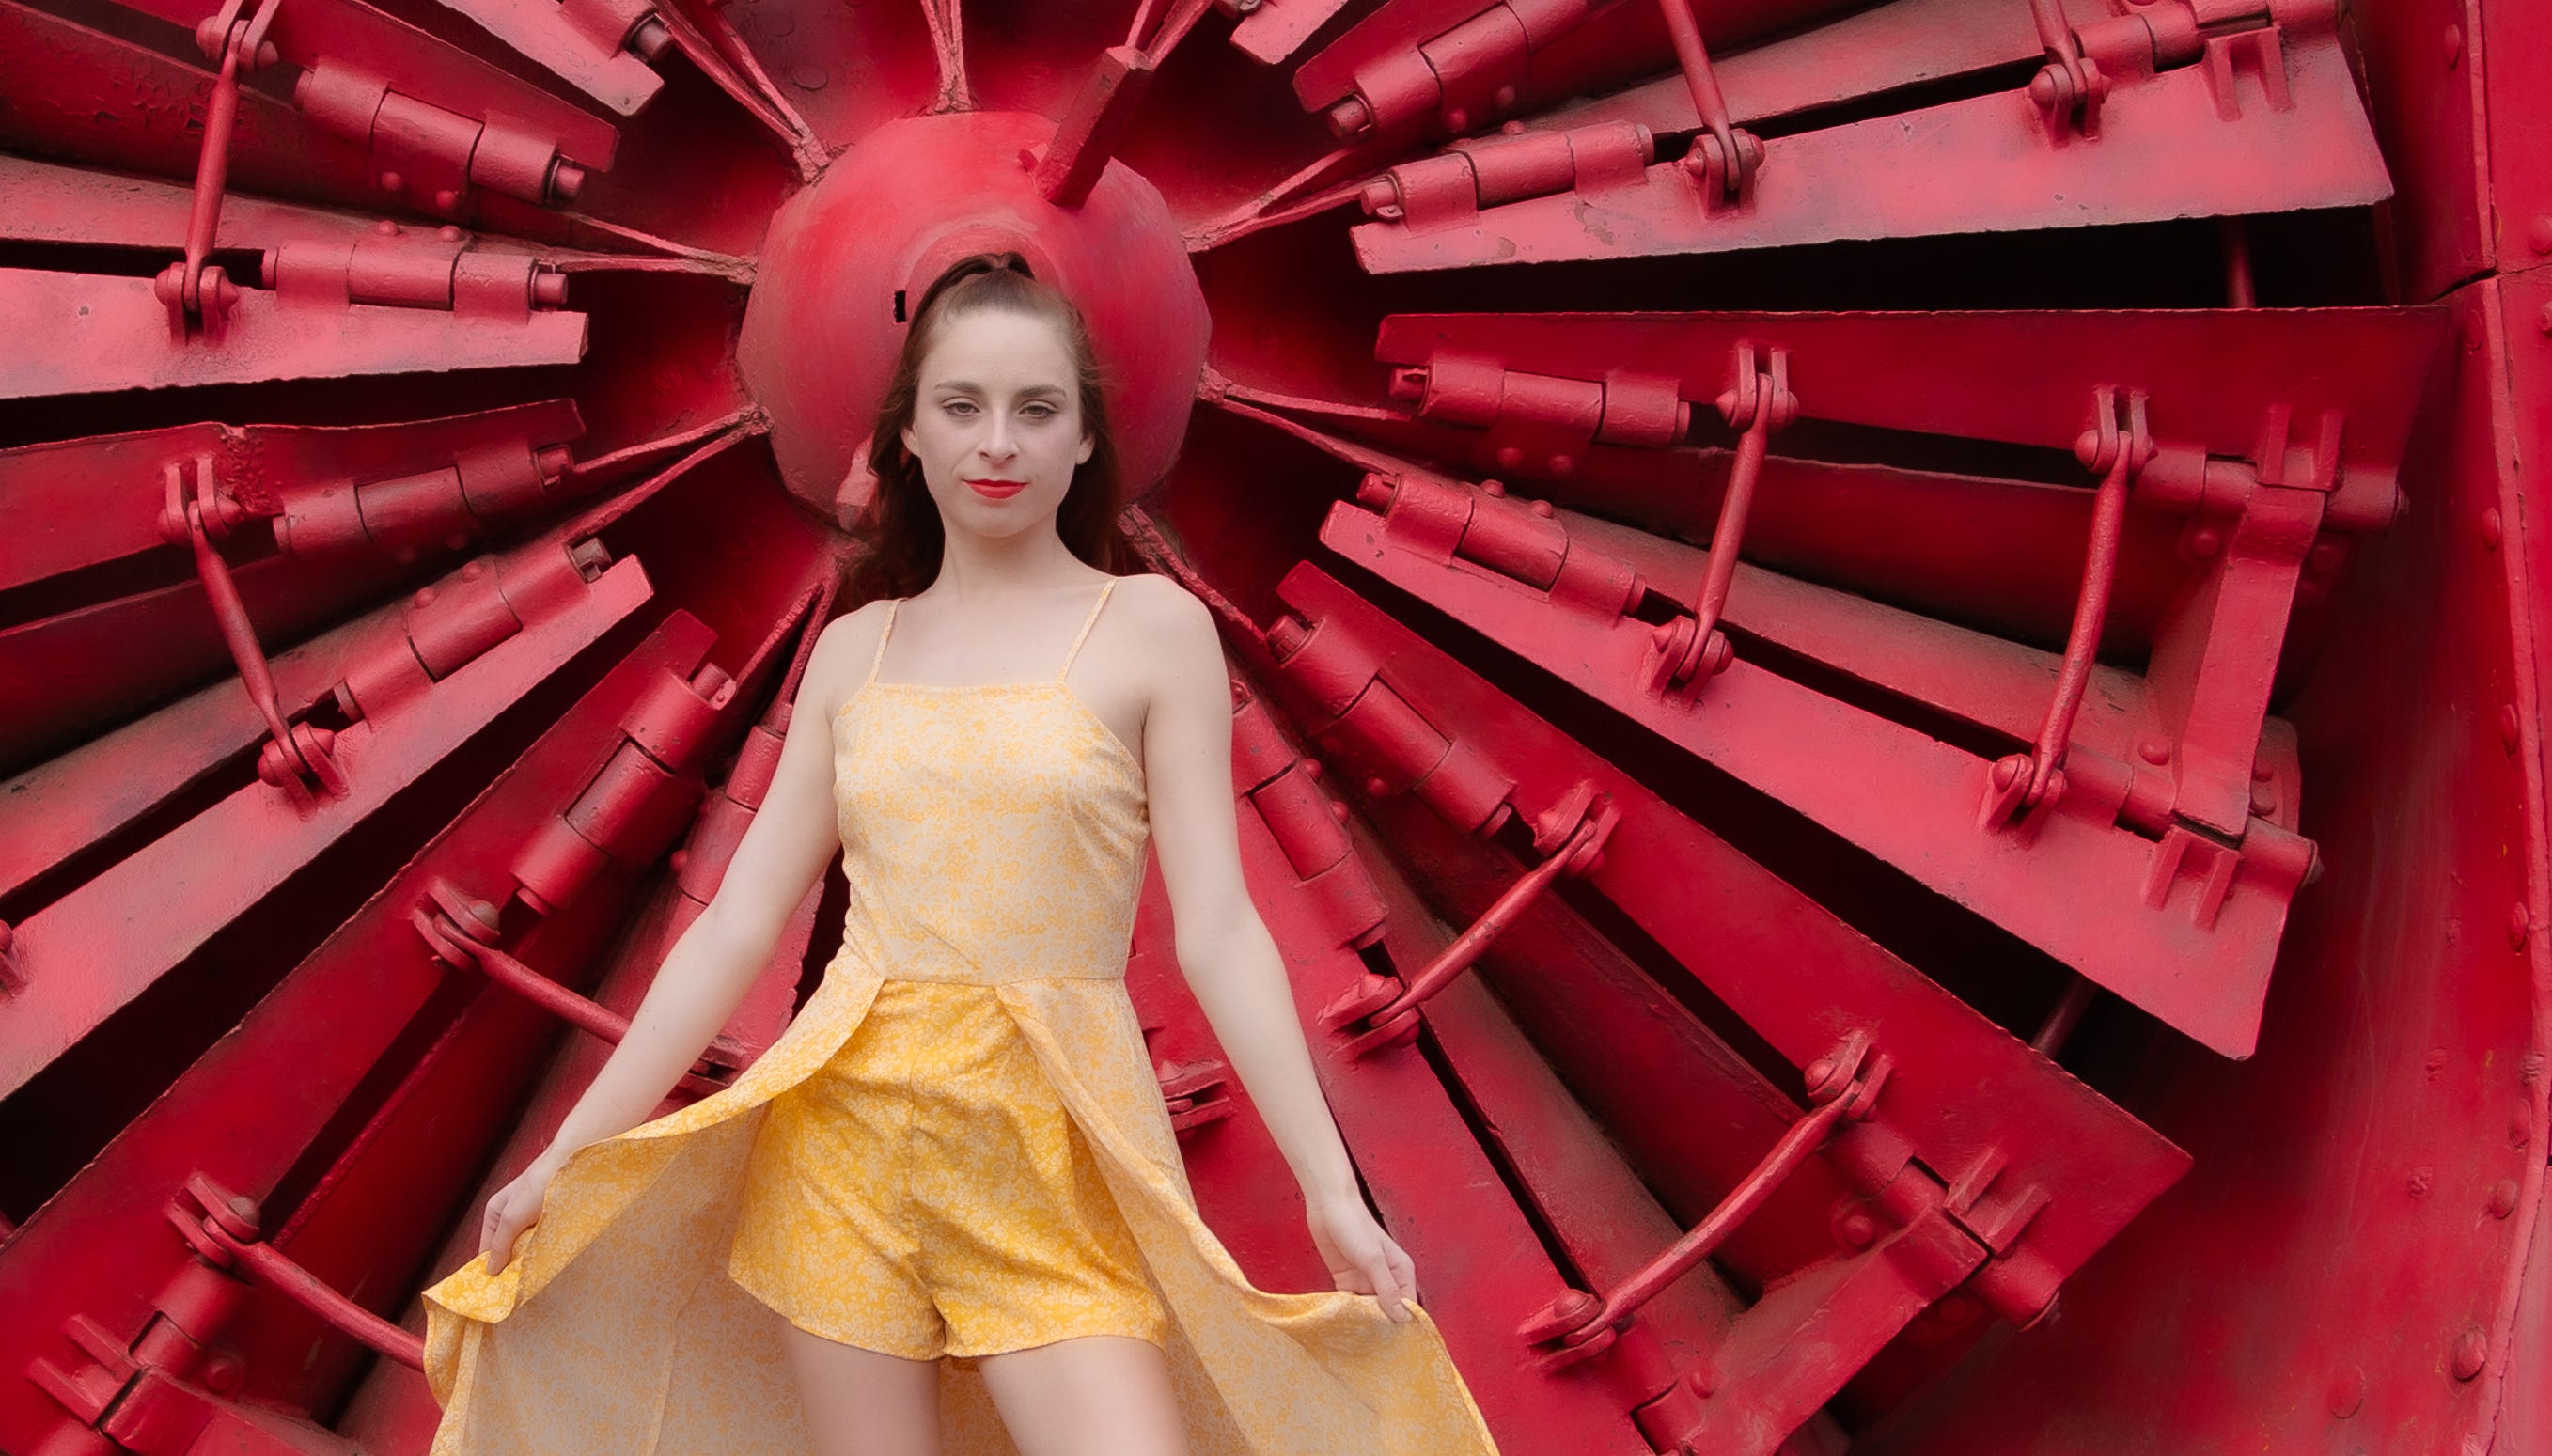
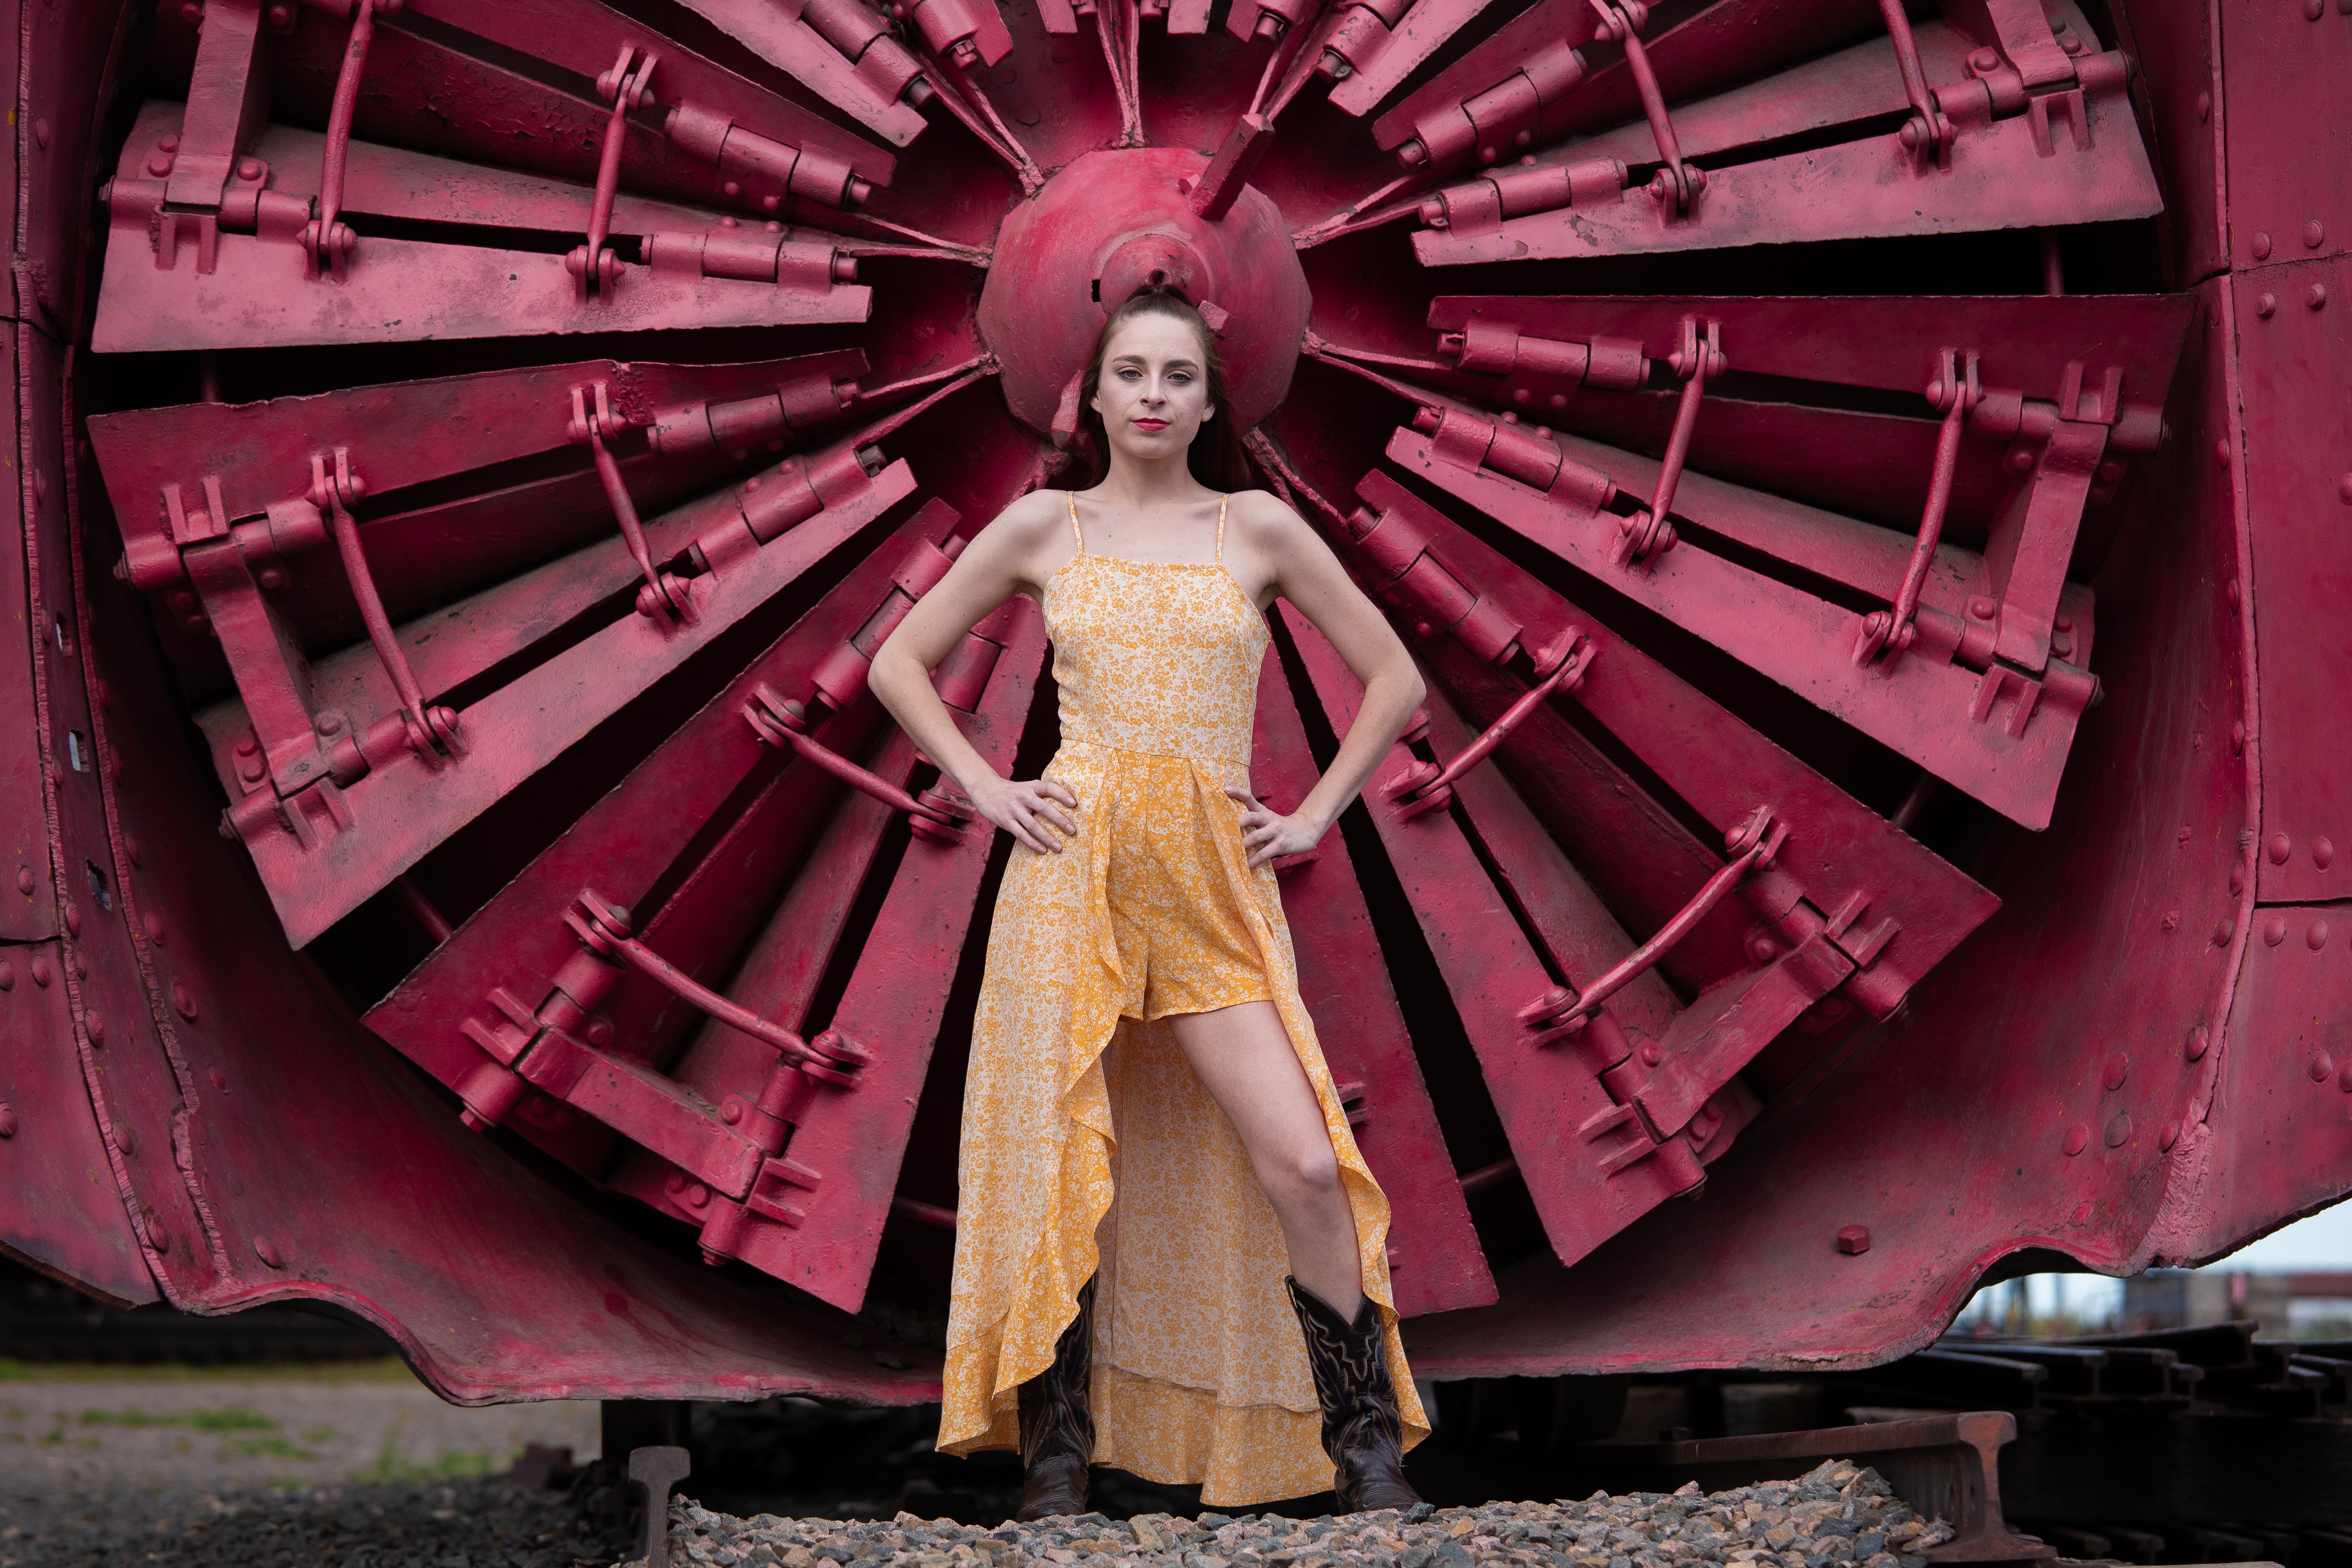
Here, Jessica is standing in front of a snowblower (I'll show you how big it was in a later pic). There was a cloud across the face of the sun, so it gave me a very soft light. Jessica’s dress is a little washed out, but is I tried to deepen the saturation of the yellows, it didn’t look right, so I left it alone. You can still see some of the pattern in her top, but not easily.
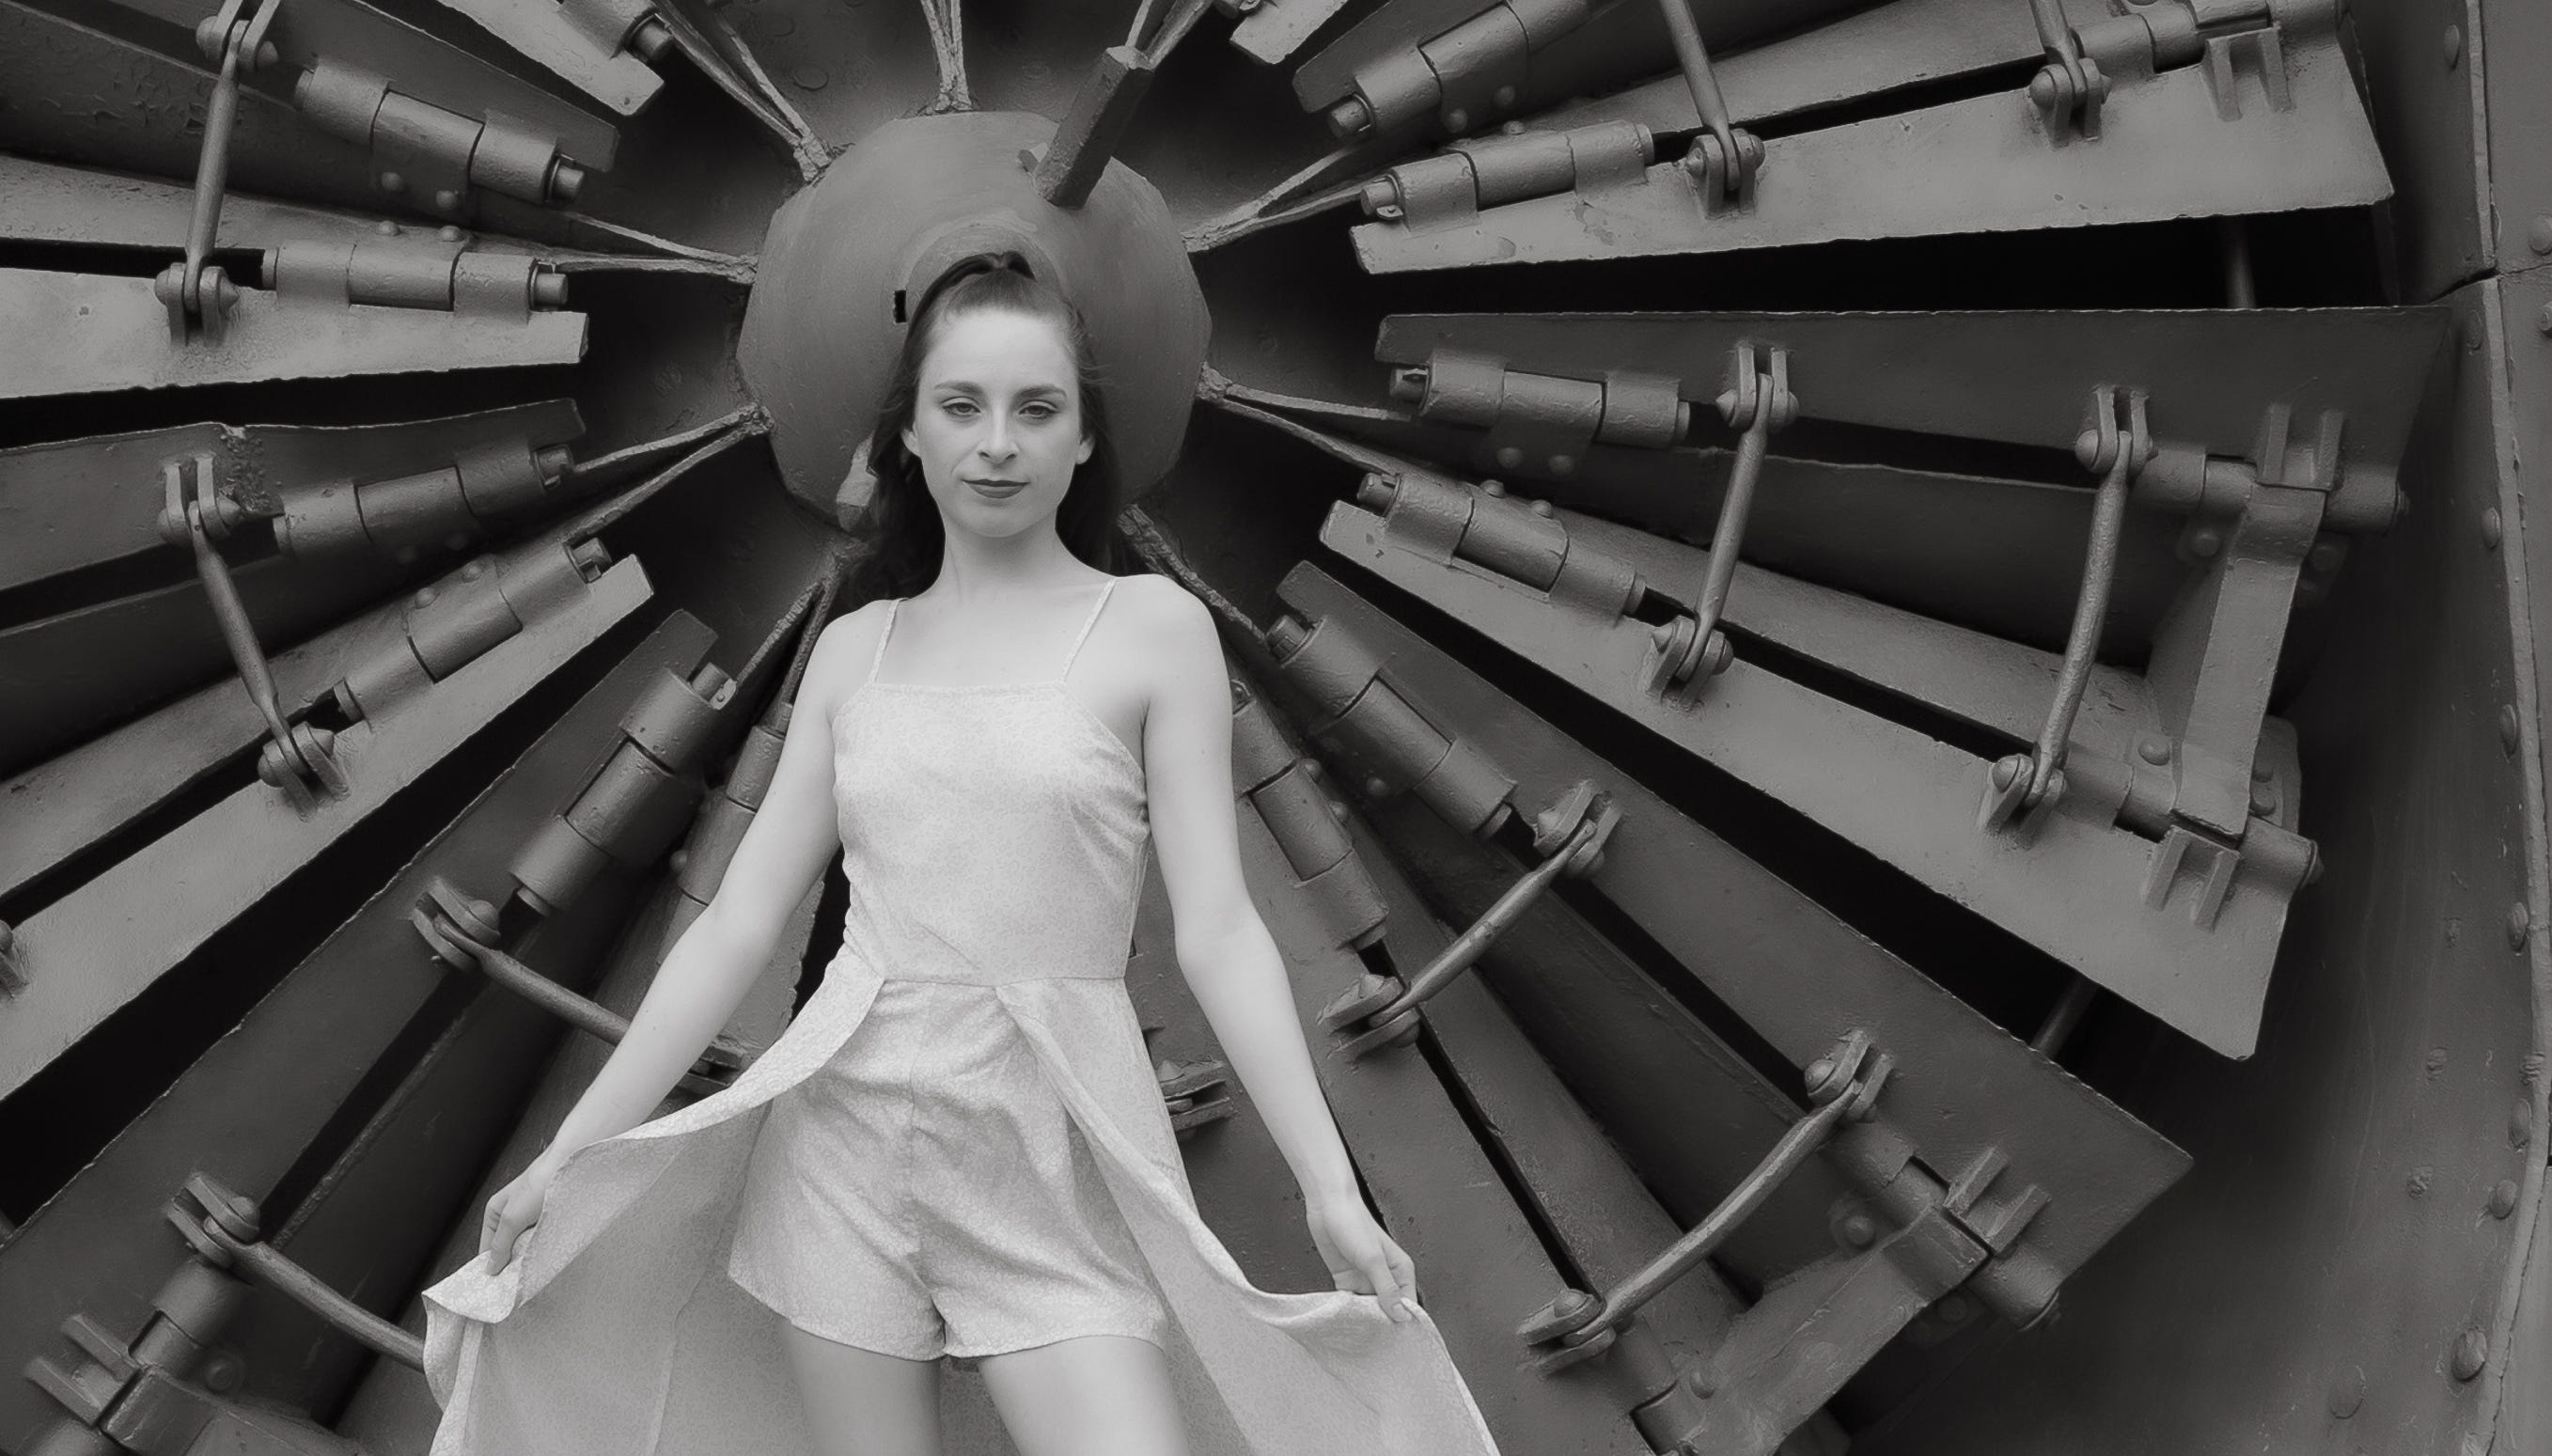
This B&W version was done by simply hitting the B&W button. Nothing else was changed, and you can see that the pattern on Jessica’s top is still a bit washed out.
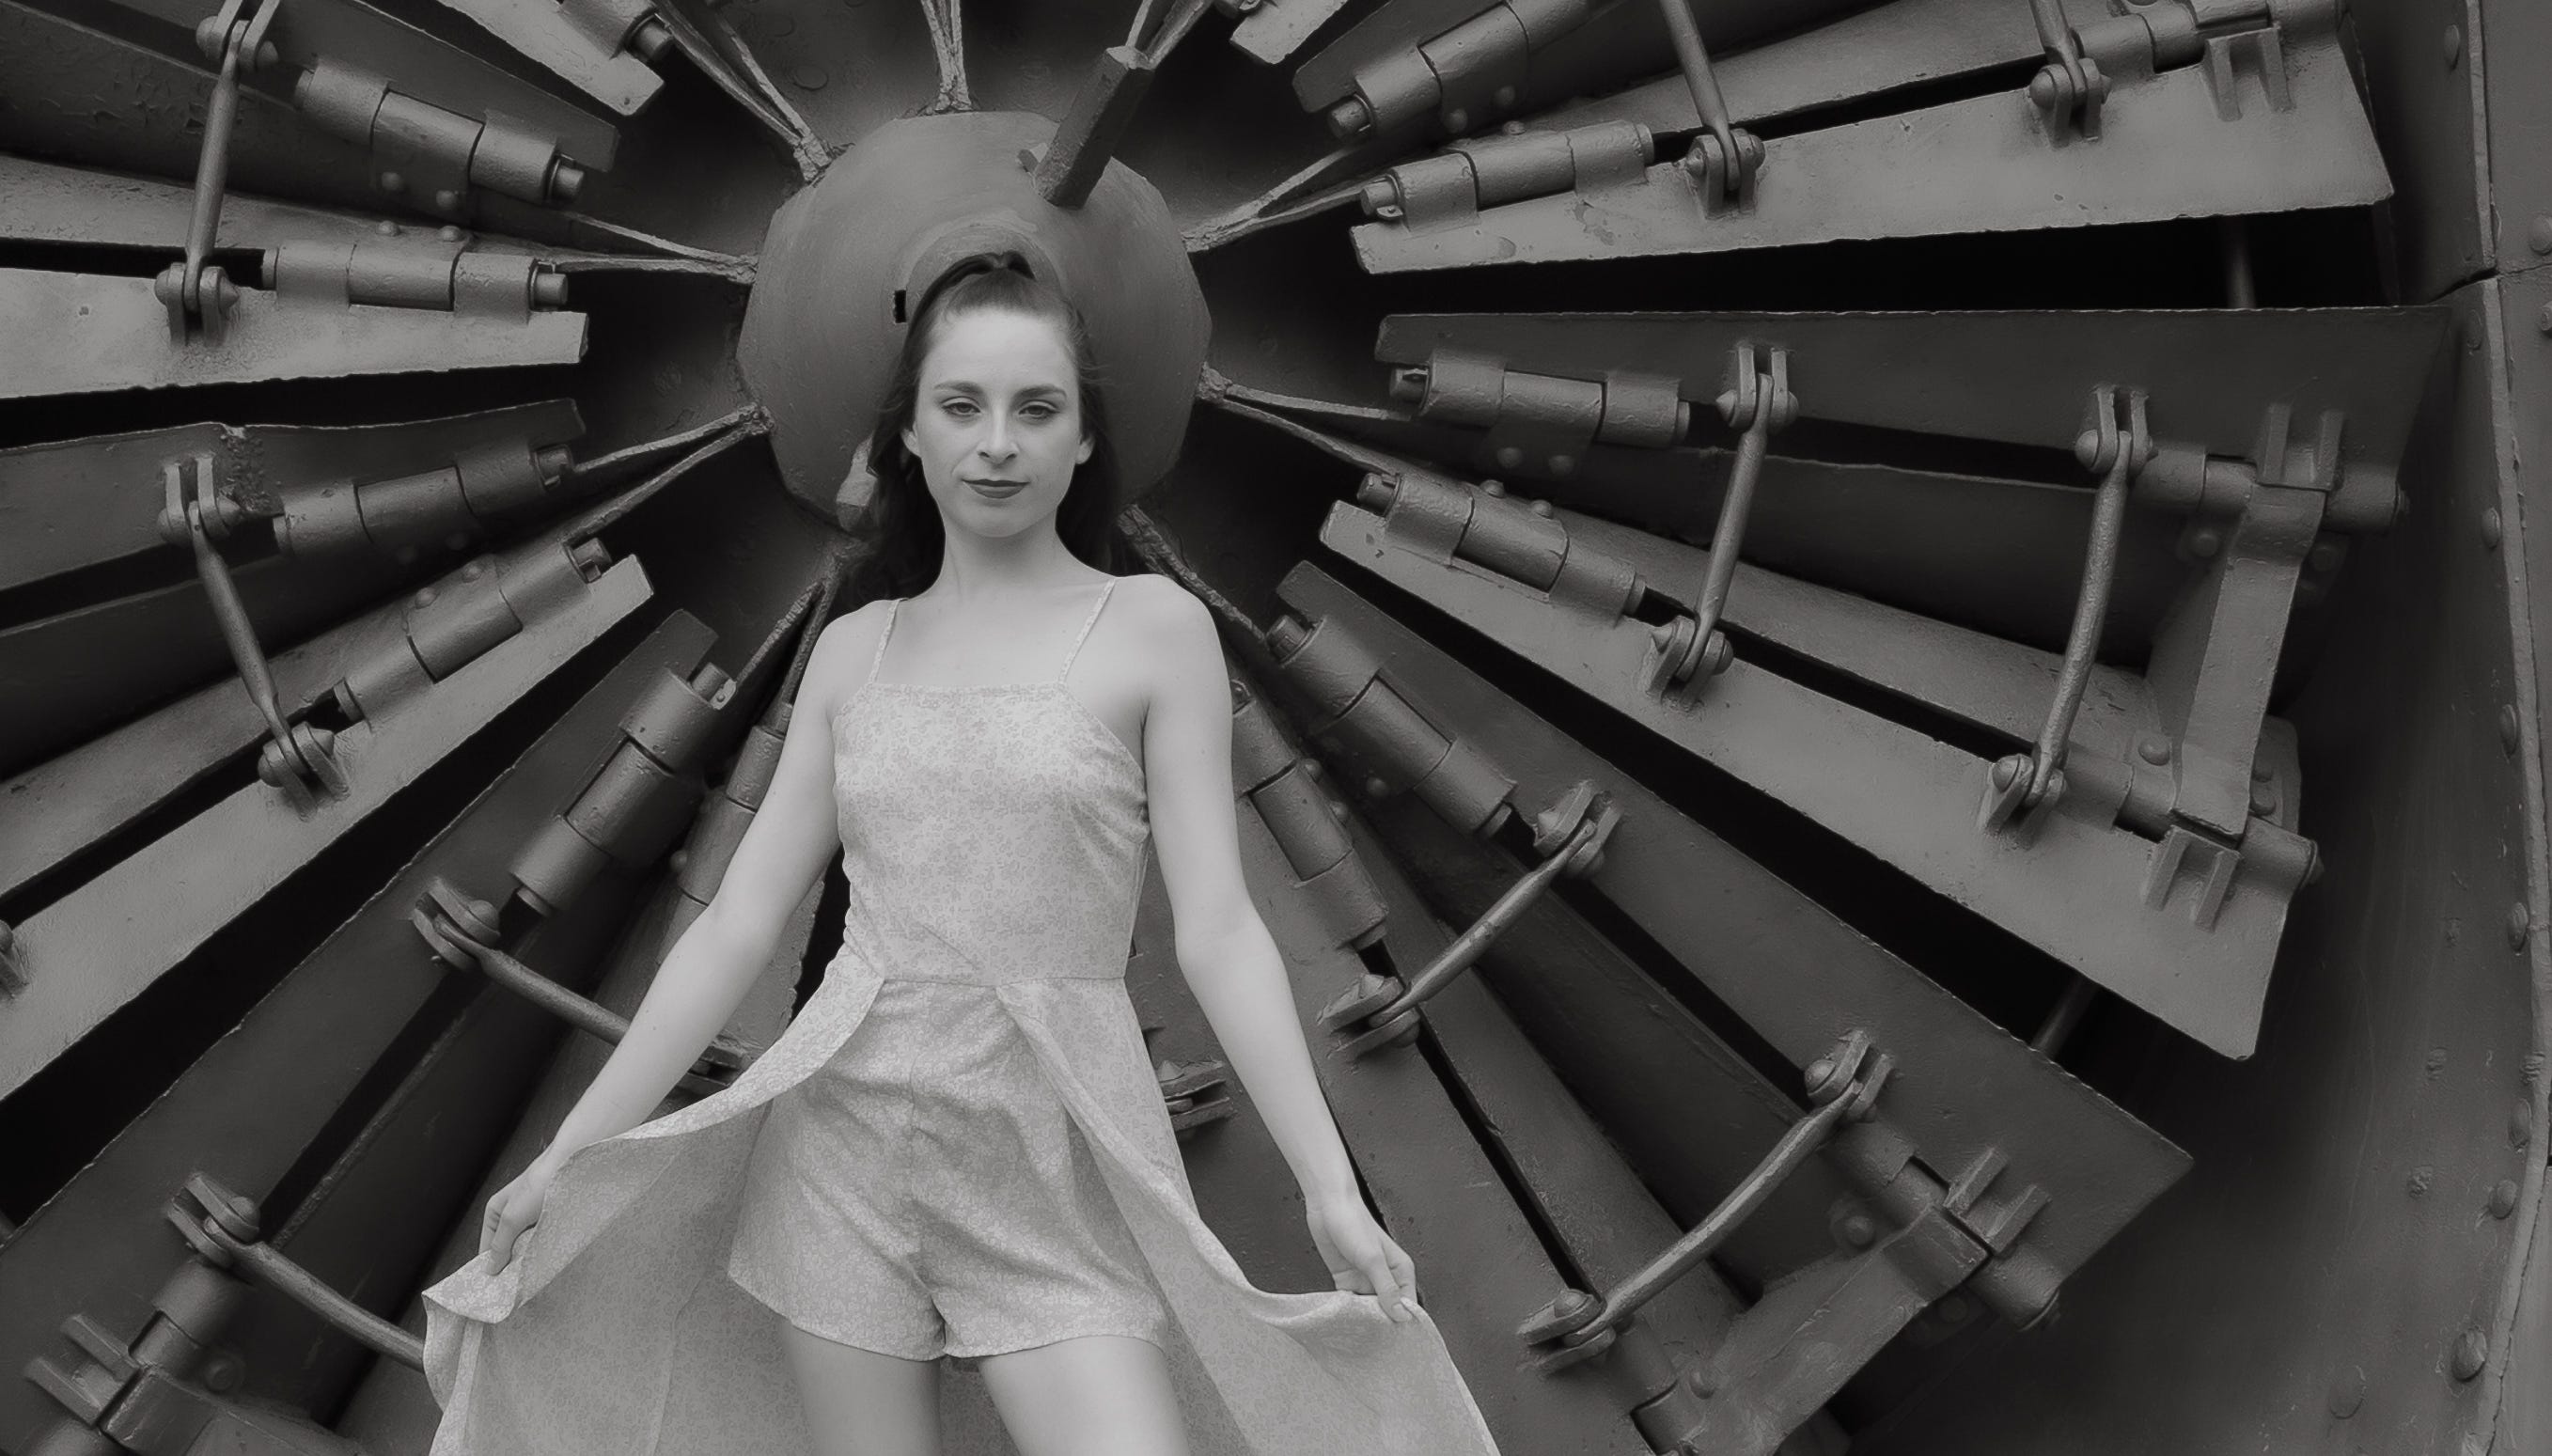
This version has a subtle, but significant, difference. I deepened the yellow saturation and it brought out the pattern of Jessica’s top. There was a slight overall darkening, but not enough for me to care. Can everyone zoom in and see the change?
I was really fortunate to have cloudy skies this day.
Here, you can see the size of the snowblower. This shot puts me in mind of a human standing in front of a sandworm (Bless the Maker and his water, bless the coming and going of him…).
Nice shot and all, but look at this in B&W.
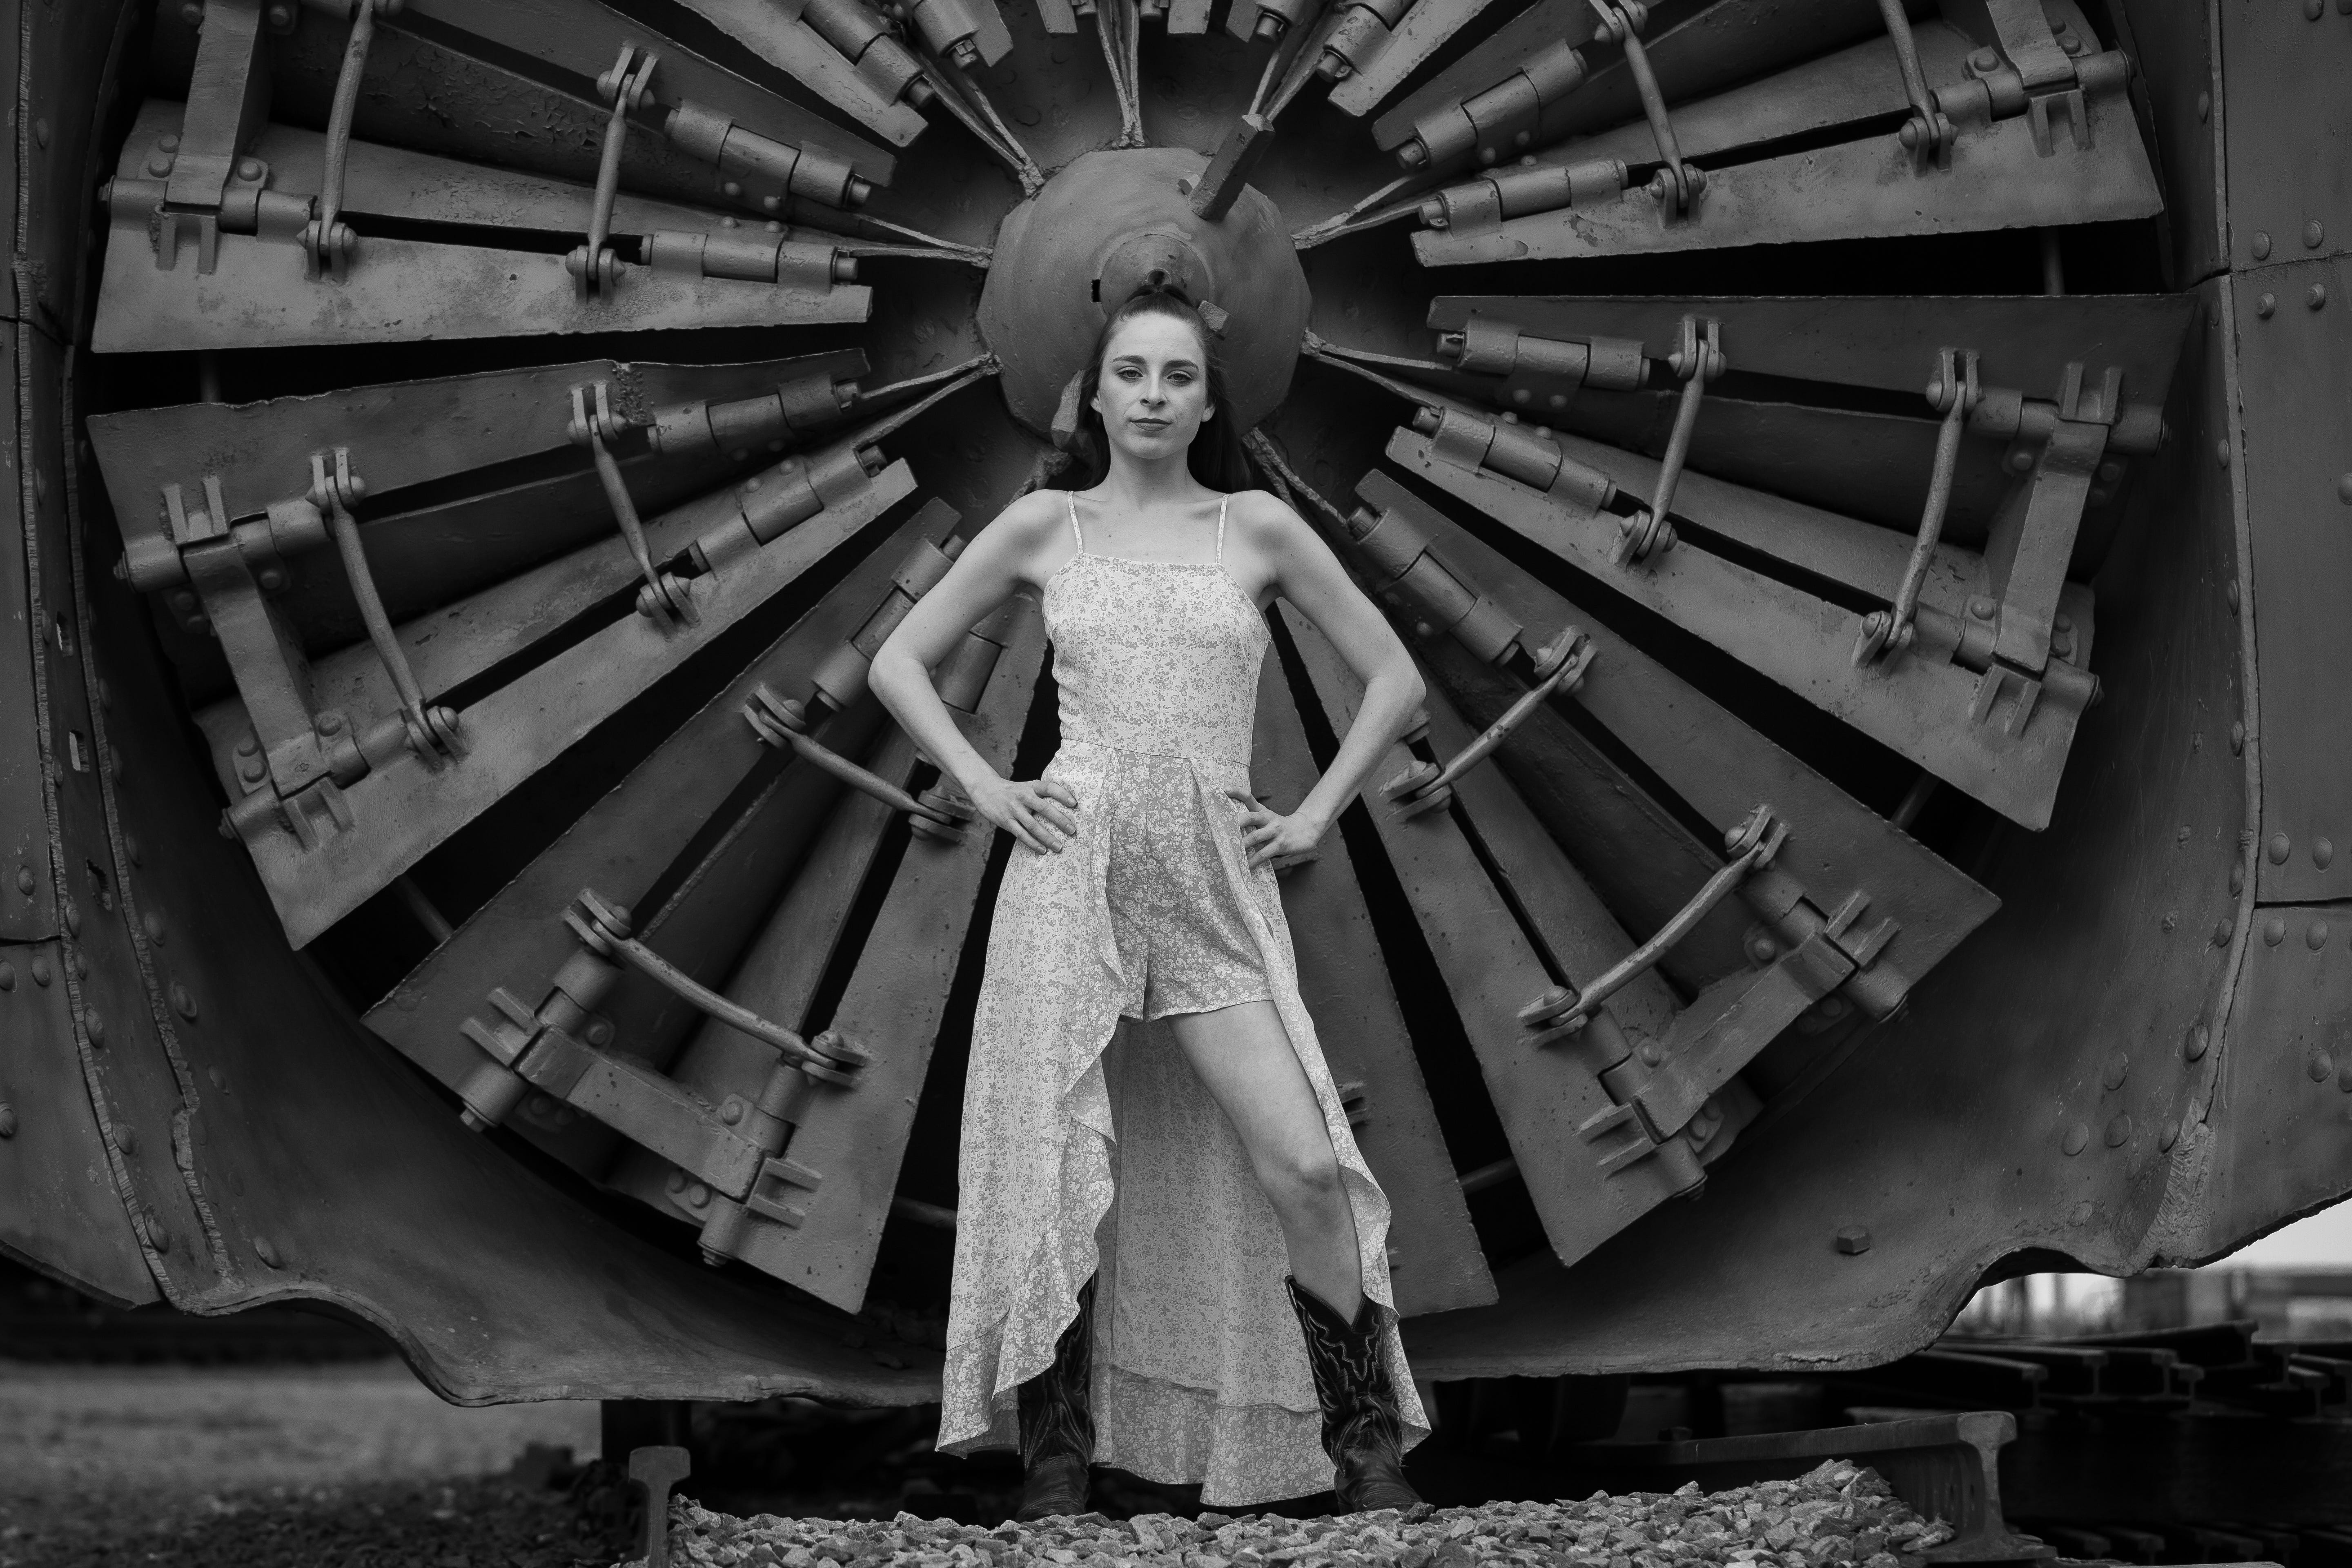
I was very pleased with this picture. If you look around the frame, you will see gorgeous detail, texture so sharp, you’d need a tetanus shot if you cut yourself. The stars aligned for me here. Jessica absolutely nailed the pose.
Color, absolutely. First 100%, other two 75 %
Out of curiosity, how many shots did you take to end up with these?